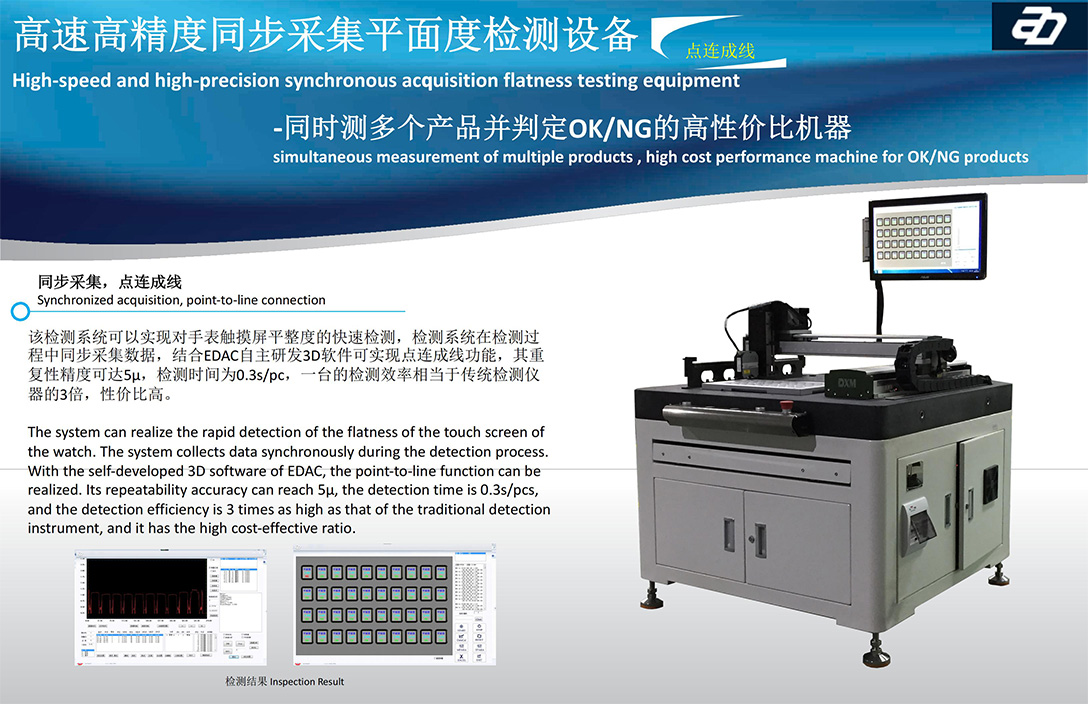
| High-speed and high-precision synchronous acquisition flatness testing equipment |
| Machine name |
High-speed and high-precision synchronous acquisition flatness testing equipment |
| Detection object |
Glass/high-brightness metal parts/plastic parts/touch screen (and glue) and other materials |
| Test content |
Flatness of watch touch screen |
| Overall dimensions |
1000*1000*1830mm |
| weight |
620kg |
| Effective itinerary |
X axis 410mm, Y axis 410mm, Z axis 100mm |
| Targeting |
Fixture positioning |
| Operation method |
Manual manual operation/single station or multi-station automatic detection (can be customized according to requirements) |
| Overall positioning accuracy of the machine |
3μm |
| Measured product size range |
33mm(L)*30mm(W) (can be customized according to requirements) |
| Main parameters of the detection system |
Point laser:
1. ILD2300-2DR point laser; 2. Spot size: 23mmX23mm; 3. Effective measuring range: 10+/-1mm; 4. Fastest sampling frequency: 49KHZ; 5. Non-contact scanning. |
| Detection time |
0.3s varies according to the size, material and point data of the measured product, and the actual time required shall prevail. |
| Detection repeatability accuracy (static) |
5um |
| Main configuration |
a.
Fangtong welding lower frame + aluminum profile upper frame + marble + XY linear motor module + product fixing fixture b. 1 computer host (EH-4PT) + 1 monitor (VS207) + 1 keyboard and mouse set (MK-200) |
| Use environment |
a. Temperature: 22℃±2℃;
b. Humidity: 55-65%;
c. Vibration: The floor vibration of the installation site, when the vibration is below 10Hz, the amplitude must be below 2μP-P. When the vibration is between 10Hz~50Hz, the acceleration must be below 0.4qal. It is recommended that the installation place be as far away as possible from vibration sources such as press machines or large truck passages to ensure the accuracy of the machine;
d. Power supply:
1.220V AC, 50HZ; (single phase: L+N+PE) 2. Power: <2000W; 3. The power socket is a triangle plug; 4. The power supply needs to be grounded;
e. Air source (when a vacuum system is required):
1. Compressed air greater than 6 kg, the air needs to be dried and filtered. There is no model requirement for the model of the dryer and filter, just ensure that the filtration density is less than 1μ;
2. Ensure stable air pressure;
3. Ensure that the consumed air flow is greater than 630L/min;
f. Product discharge connection (the following method can be used if necessary Do connection):
OK is connected to the conveyor belt for manual visual inspection, and NG products are directly connected to the distribution box. |
| * The detection accuracy that can be achieved due to different materials of products and different surface treatment processes will vary, and the actual measurement results shall prevail. |
 Multi-station detection plus scanning laminating machine
 Height difference and gap measurement machine
 Multi-Functional Ring Track Inspection Machine
 3D Array Camera Inspection Machine
 High Speed & Precision Inspection Machine with 3D Camera
 Touchpanel Flatness Inspection Machine
 Type-C Inspection Machine
 Flatness Inspection Machine
 Mental Frame Inspection Machine
 Sweat and Ocean Constant Temperature Humidity Machine
 Fully Automation Modular Inspection Machine
 Automatic precision adjustment resistor machine
 Flatness testing machine
 Drum paper F0 test machine
 Miniature Drum Paper Sound Film F0 Tester ECL-01
 Bullet Wave Tester I-009P


